Optifine is a mod for Minecraft that increases performance and visual quality, as well as reduces lag. It does this by disabling unnecessary graphics features, like dynamic lighting or shadows, which are resource-heavy. By default, Optifine disables all of its optimizations when you install it. In order to get the most out of it, you’ll have to re-enable those settings after installation. This article will explain exactly how to do that… Read on!
What’s New in Optifine and Should You Install It?
The latest version of Optifine is 1.18.2, which was released in February 2019. The mod is updated constantly with new optimizations and features, so it’s always worth keeping a close eye on new versions. The latest update includes: Better performance for Intel HD Graphics and AMD GPUs, Better support for HD textures, and Improved support for Minecraft Realms. As always, you can find out more about the latest version of Optifine via the official website – https://optifine.net If you’ve never used the mod before, or you’re unsure how beneficial it will be, then it’s best to read on. This article will explain how to install the mod, and what it does exactly. You’ll also get a better idea of whether it’s right for you.
How to Install OptiFine for Minecraft
Before you can begin using Optifine, you need to install it first. If you haven’t already done so, visit the official website and download the mod. Need help installing mods? Follow this guide. Once you’ve downloaded the mod, open up your Minecraft launcher. Next, click open at the top, then select Open File. Once the file has been opened, click Install at the bottom. Once the installation is complete, you can start playing Minecraft. To load the mod, open your Minecraft launcher, go to Options at the top, and click Open Game Dir. Once in the game directory, scroll down until you find the mods folder. Place the downloaded mod file inside the mods folder. You can now start playing Minecraft with the mod installed. When you load the game next, you’ll see the mod loaded in the top right corner. read more optifine 1.18.2
How to Install Optifine via Auto-installer
If you’re not comfortable installing the mod manually, you can use the auto-installer to do the job for you. First, download the auto-installer .jar file from the official website. Once the file has been downloaded, open up your Minecraft launcher. Next, click open at the top, then select Open File. Once the file has been opened, click Install at the bottom. The auto-installer will automatically install the mod for you. Once completed, you can start playing Minecraft. You can load the mod in the same way as you would with the manual installation. When you load the game, you’ll see the mod has been loaded in the top right corner.
How to Install Optifine for Minecraft Manually
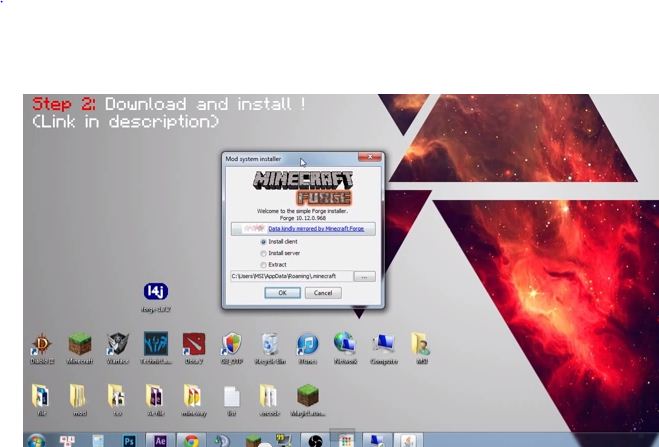
If you prefer to install the mod manually, or you want to make sure the auto-installer doesn’t mess up, you can do so. First, you’ll need to head over to the official website and download the mod. Once downloaded, open up your Minecraft launcher. Next, click open at the top, then select Open File. Once the file has been opened, click Install at the bottom. Once the mod has been installed, open your Minecraft game directory. You’ll find it in your C:\Users\YourComputerName\AppData\Roaming\ folder. Once in the game directory, locate the mods folder. Place the downloaded mod file inside the mods folder. You can now start playing Minecraft with the mod installed. When you load the game next, you’ll see the mod loaded in the top right corner.
Enable fast-rendering and more graphics features with Ultra Fast Mode
Ultra Fast Mode enables fast rendering, as the name suggests. This mode is designed to increase performance in Minecraft by limiting all of the detail in the world to the closest player. You’ll also notice that dynamic lighting and fog are disabled, as are particles and water animations. This mode is useful if you want to play Minecraft with the lowest possible graphics settings. To enable Ultra Fast Mode, open up the Optifine configuration menu by clicking the icon in the top right corner. Once the menu has opened, click the drop-down arrow next to the Mode option, and select Ultra Fast Mode.
Enable shadows and more graphics features with FPS Boost Mode
FPS Boost Mode disables all of the extra graphics features, as well as some of the game’s sound effects. This mode is designed to improve performance by reducing CPU and GPU usage. It’s particularly useful if you’re playing on a poor computer. To enable FPS Boost Mode, open up the Optifine configuration menu by clicking the icon in the top right corner. Once the menu has opened, click the drop-down arrow next to the Mode option, and select FPS Boost Mode.
Adjust light distance and enable better visuals with Visual enhancement mode
Visual enhancement mode enables shadows, fog, and water animations, as well as particle effects. This mode is designed to give you the best visuals possible. It’s recommended for players who want to play Minecraft with the best visual experience. To enable Visual enhancement mode, open up the Optifine configuration menu by clicking the icon in the top right corner. Once the menu has opened, click the drop-down arrow next to the Mode option, and select Visual enhancement mode.
Conclusion
This article has shown you how to install Optifine and what new features and graphics improvements it can provide. To get the most out of the mod, you’ll need to enable certain modes. If you’ve never used the mod before, or you’re unsure how beneficial it will be, then this article has provided you with all the information you need. You’ve learned how to install the mod, and what new features it can provide. Hopefully, you now understand why so many players use Optifine and want to use it too. With this mod, you can enjoy Minecraft with better performance and visuals.